Let's be honest; behavior charts are a lot of work. Between managing each section of the day, sending it home each night, having it returned each day, and making copies for your records, it's no wonder why so many can be less than effective. I utilize Google Apps a lot in my room, and I knew there was a way to use Google as a tool to make my life a little bit easier.
Below is a picture of my behavior chart. I made it using Google Slides. It's super easy to make, but if you want a free copy of mine, head on over to my Instagram page (@happylittlekindergarten) and find out how to get a copy of mine for FREE.
Here's how I use mine:
1. Instead of sending home a paper each night, I simply share my Google Sheet with the parent. I encourage the parent to download the Google Sheets App on their phone so they can checkin throughout the day.
2. I also share this with my student on Google Classroom. Tip: Only allow the student to view this in the 'advanced settings'.
3. Make a copy and add pages for each week. This way you can make sure you have every copy of the behavior chart for your records.
4. Add comments in sections to describe why the child didn't each a checkmark by clicking 'insert' and 'comment' in the section. This can help explain behaviors to the parent, principal, behavior specialist, etc.
The engineering process is an important step in using STEM in your instruction. I find that many kids these days don't know how to persevere through failures. I've found that teaching the engineering process while teaching STEM lessons helps lesson the helplessness and encourage students to think outside the box.
Here is a STEM lesson I taught and a few helpful tips I learned along the way to limit the chaos!
1. Teach the engineering process
Focus on the fact that engineers almost never get it right the first time. I show this Kid President video then explain how the engineering process is an ongoing cycle.
2. Introduce the problem (ask & imagine)
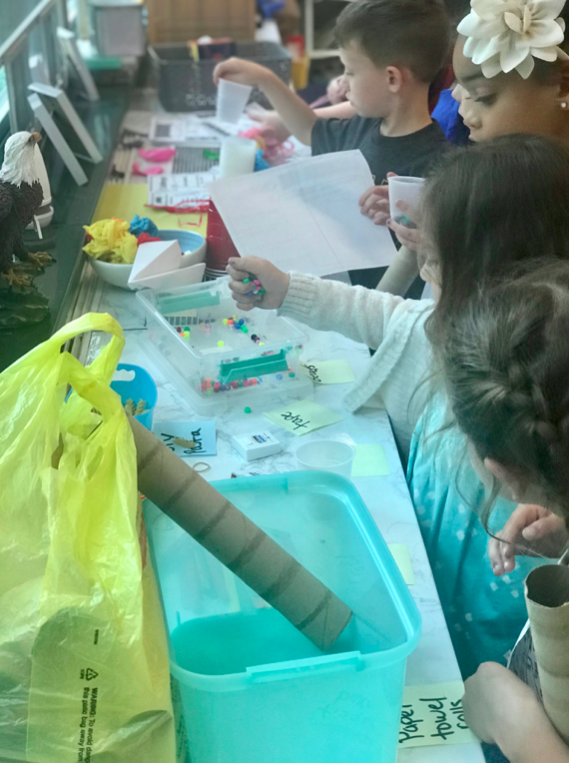
Explain to students that we have to make instruments that make at least 2 sounds. Reiterate that is does not have to look like a traditional instrument. My class had a long conversation about this. I even showed them a Stomp video. I gave out the material list and explained that they could use only 5 items on the list to make their instruments. I gave students time to imagine their concepts and talk about it.
3. Plan
Students use their planning paper and the materials list to draw out their concepts. My students walked back and fourth between their tables and the materials to get ideas.
4. CREATE!
I use a cute stamp to 'approve' their designs. Once approved, students can get materials and begin to design. Some students had a lot of trouble in they stage. I allow students to replan their instrument if an idea isn't working out. Warning: this is messy and loud. Get used to it.
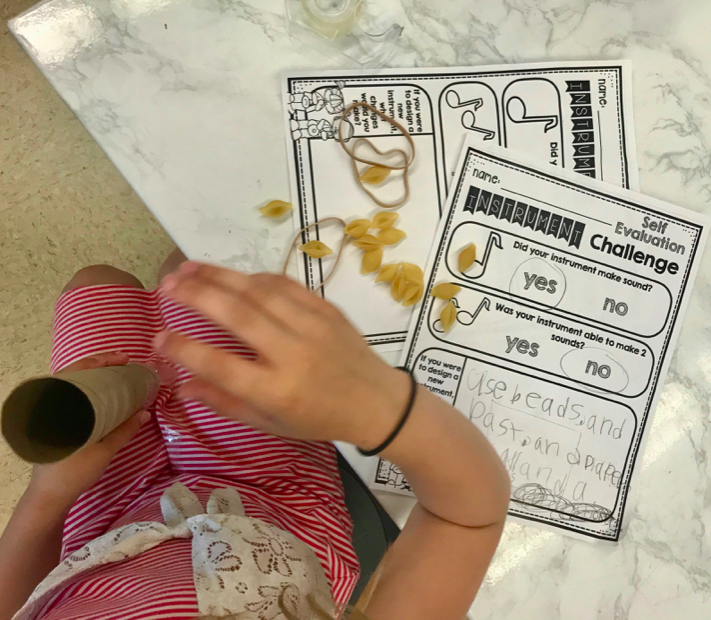
5. Test and improve
Students use the self-assessment paper to test and improve their designs. I allowed students to redesign or keep their original if they were happy with it. If the students needed something to do they can help a friend or decorate their instruments.
Because the engineering process is an ongoing cycle, technically you could do this projects for weeks. However, I'll admit I was happy once this was over! It took a little planning and a lot of cleaning, but overall I felt it was successful because my students were able to express themselves creatively, work though problems, and have fun! Good luck!
Get the full lesson plan HERE!